Remove the camera, battery, memory card protector, and microSD card from the packaging.
Open the battery cover and insert the battery into the camera.
Remove and detach the memory card/connector cover from the camera.
Insert the microSD card into the camera.
Attach the memory card protector to the camera.
Turn the camera on.
Follow the on-screen prompts to set the language, area, date, and time.
Set the Shoot Mode to Movie Program Auto. Navigate to MENU > Shoot Mode/Drive > Shoot Mode and select Movie Program Auto.
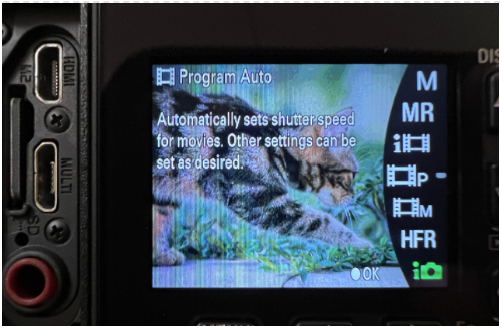
Note: there are two settings labelled 'Program Auto', the correct setting is the one with the picture of a cat on it (seen in Figure 1). Step 11 can not be completed if the shoot mode is on any other setting.
Set the Audio Recording to Off. Navigate to MENU > Movie2 > Audio Recording and select Off.
Set the Auto Power Off Temperature to High. Navigate to MENU > Setup1 > Auto Power OFF Temp and select High.
Set the TC Format to NDF. Navigate to MENU > Setup2 > TC/UB Settings > TC Format and select NDF.
Set the TC Run to Free Run. Navigate to MENU > Setup2 > TC/UB Settings > TC Run and select Free Run.
Note that the NTSC/PAL selector must be set to NTSC for the timecode settings to be available MENU > Setup2 > NTSC/PAL Selector.
Set the USB Connection to PC Remote. Navigate to MENU > Setup3 > USB Connection and select PC Remote.
Turn the camera off.
Repeat steps 1-13 for each camera.
Figure 1: This is the correct program auto setting. Select this one.
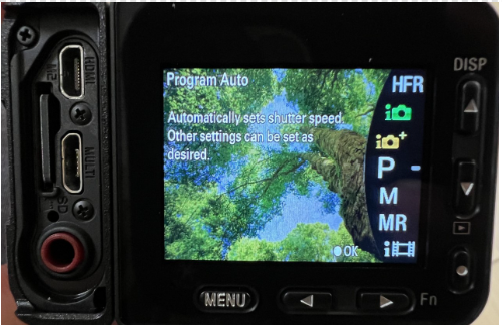
Do NOTchoose this version of program auto, it is the incorrect setting.
Navigate to theRX0 II downloads pagein a web browser. Download and install the latest DSC-RX0M2 System Software (Firmware) Update if available.
Connecting The System
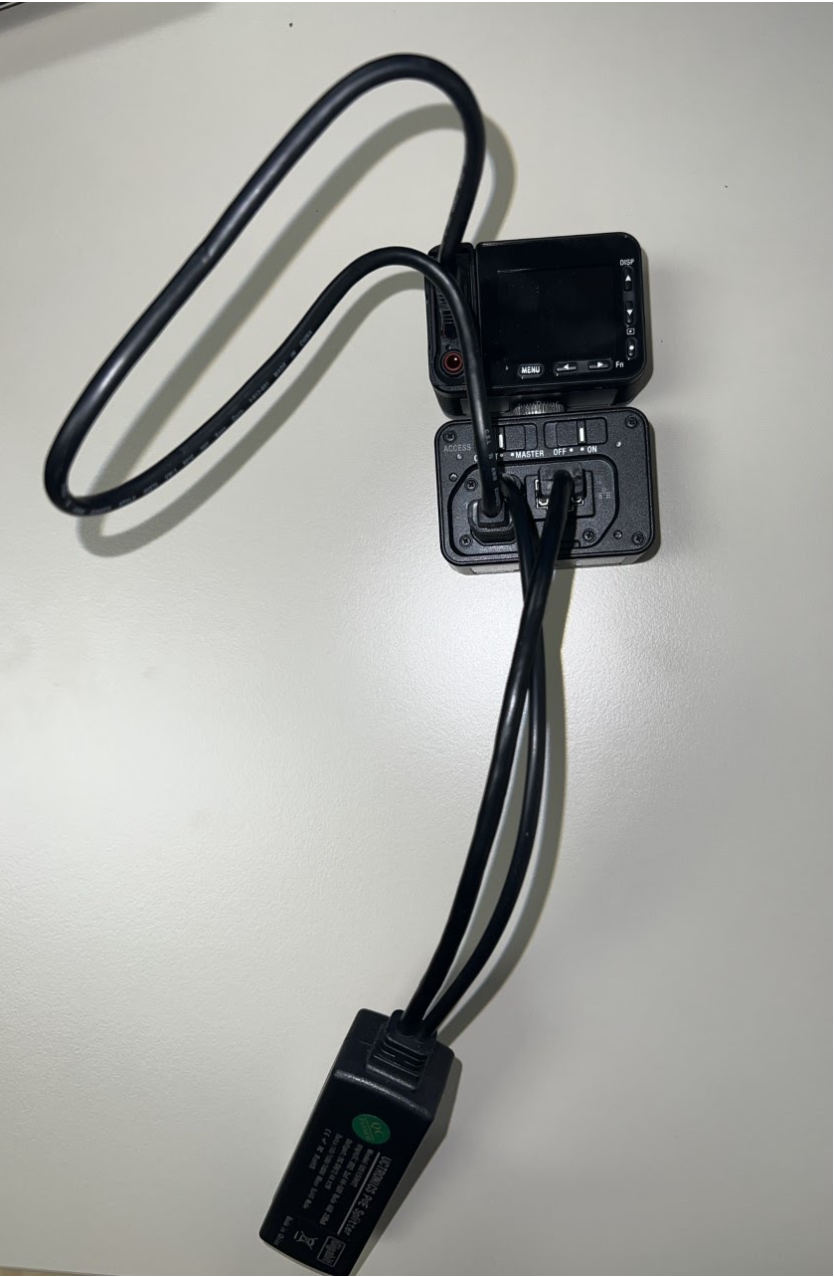
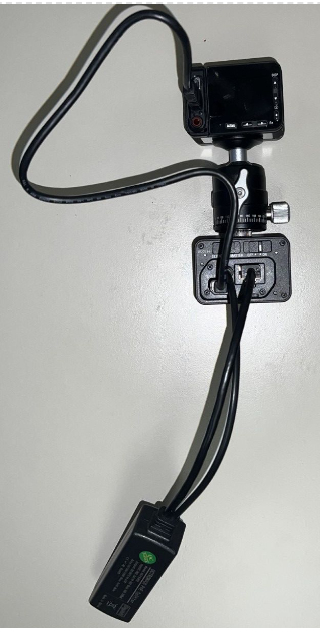
Connect the control box, shorter multi-cable (found in the control box packaging), camera, and splitter using the male-to-male 1/4" thumb screw as seen in Figure 2 (Figure 3 if you purchased the magnetic mounts found in Product List). Both cables of the splitter go directly into the control box. The multi-cable connects the control box to the camera.
Figure 2: Without magnetic mount gimbal
Figure 3: With magnetic mount gimbal
Final Setup using Sony GUI
Before collecting data, it is crucial to ensure that the camera system is set up correctly to collect data as intended. The following steps describe how to adjust the camera settings for the collection of synchronized video data for markerless motion capture.
Note: there are a few settings that cannot be changed through the Sony GUI, so the initial camera setup settings should be done first.
Connect all the cameras to the switch by inserting one end of the ethernet cable into the PoE Splitter, and the other end to a port on the switch. Make sure that the switch is connected to the computer using the additional ethernet cable.
To access the data collection GUI, open Google Chrome and navigate to http://169.254.200.200/
Turn on cameras: Select all > Power on
Select one camera using the checkbox next to its name.
Adjust the settings to the following (our defaults):
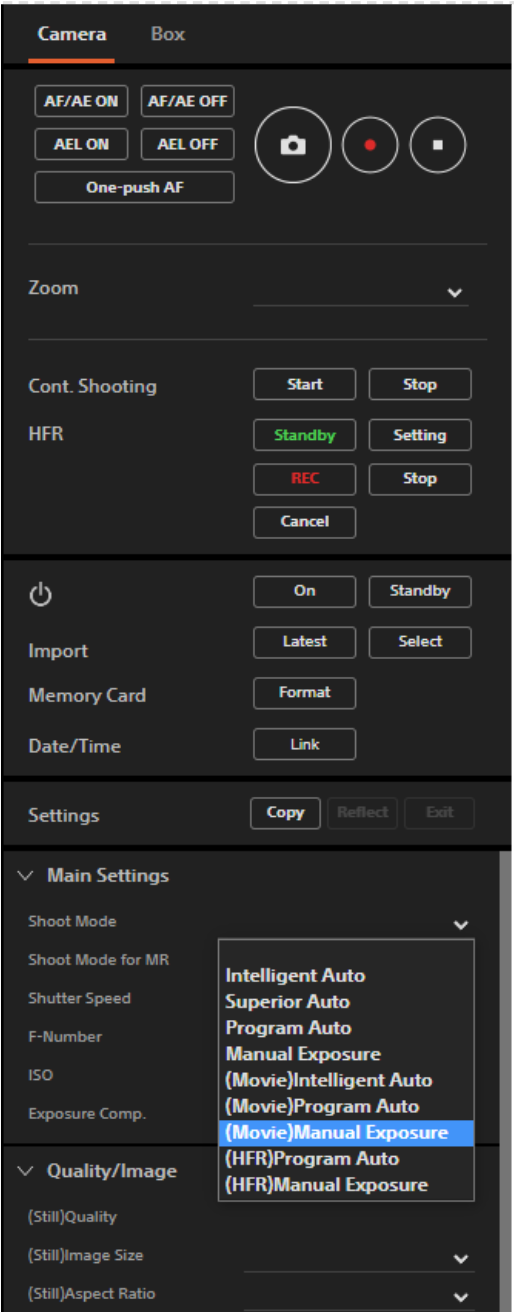
Shoot Mode: (Movie) Manual Exposure (Figure 4 to 6). This will allow you to have optimal control over your settings.
Note: Theia documentation suggest (Movie) Program Auto. But (Movie) Manual Exposure unlocks the Shutter Speed setting which may be useful for higher-speed movements.
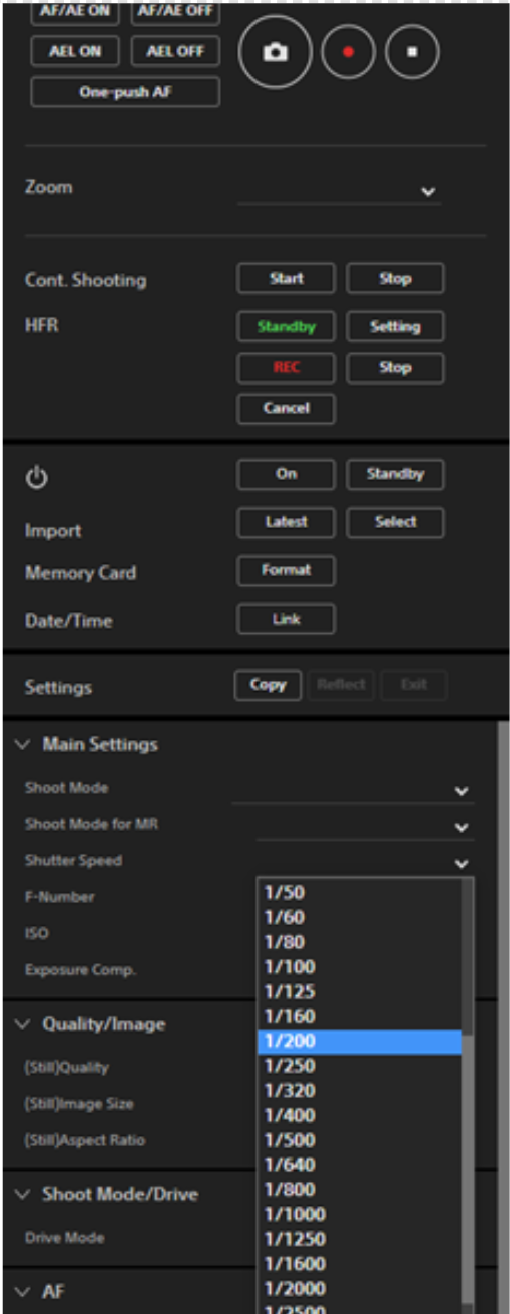
Shutter Speed: 1/125 (Figure 5). If collecting at framerates higher than 60 Hz, this may need to be increased to ensure images are not blurry.
Note: In general shutter speed should be set to twice the frame rate. Therefore, for a frame rate of 60 Hz, the shutter speed should be set to at least 1/125 s. A fast shutter speed (e.g. 1/250 s) will produce a darker picture with little to no motion blur (depending on the speed of the subject), while a slow shutter speed will produce a lighter image with a more pronounced motion blur. To mimic motion the same way the human eye experiences it in real life, the 180-degree rule states that the shutter speed should be set to double your frame rate.
Focus Mode: Preset Focus
Note: If the camera seems out of focus – double-check that these settings are correct. Do this by redoing the copy and reflect of all cameras – not just the one that isn't focused.
Near Mode in PF: OFF
(Movie) File Format: XAVC S HD
(Movie) Record Setting: 60p50m. Interpreted as 60 Hz framerate, 50 MB/s bit rate. This setting can be adjusted based on the data collection requirements, if collecting faster movements, the frame rate may need to be increased.
Next to Settings, click Copy. This copies the current settings of the selected camera.
Deselect the currently selected camera and Select All cameras. Next to Settings, click Reflect. This matches the settings of the currently selected cameras to those of the camera you previously set. This can take some time.
Ensure that for each camera, displays saying Video Sync and TC Sync are visible. Video Sync appears when the camera exposures are synchronized. TC Sync appears when the video timecodes are synchronized.
Note: Both are required to ensure that your data will be usable. If these are not visible, you may need to reinitialize the cameras. To do this, make sure all cameras are selected, click on the ‘Box’ tab and click on ‘Initialize’. This will take some time.
Figure 4: Setting the Shoot Mode to (Movie) Manual Exposure
Figure 5: Setting the Shutter Speed
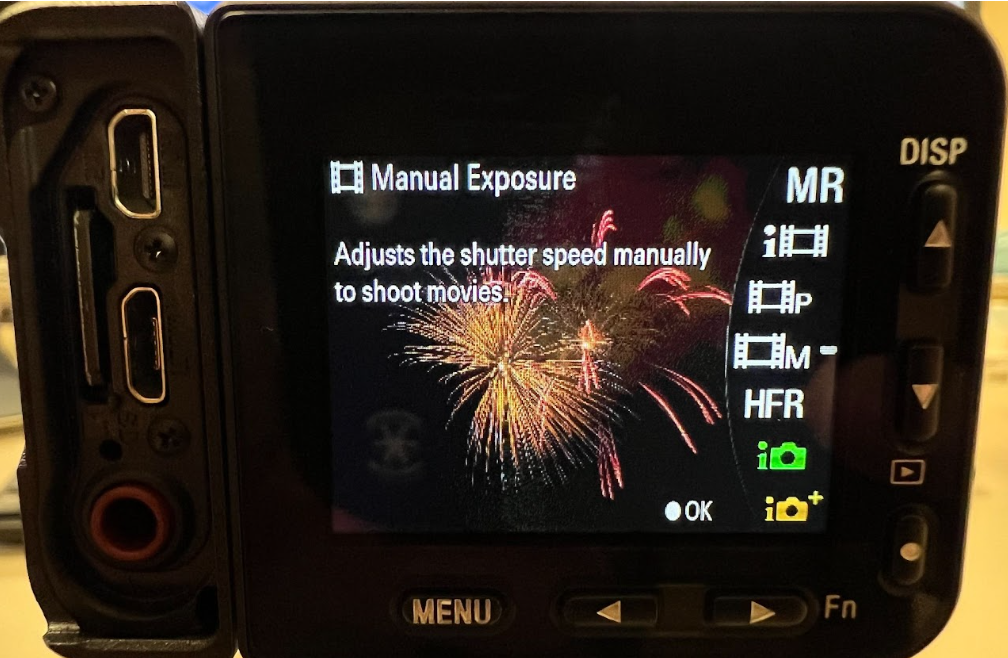
Figure 6a: Correct (Movie) Manual Exposure setting if set through the camera
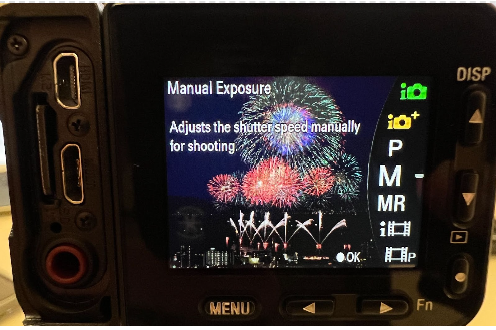
Figure 6b: Incorrect setting. Do NOTchoose this version of Manual Exposure.